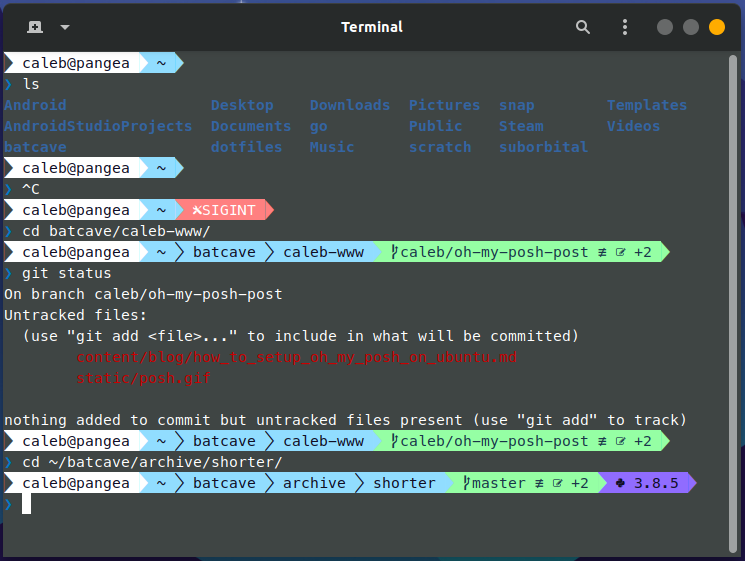
While onboarding at my latest internship I noticed that my manager had a very aesthetically pleasing shell. Upon further inspection I discovered he was using something called Oh my Posh. It markets itself as, “A prompt theme engine for any shell.” It’s more than pretty though — it will also show you Git status, error codes, Python versions, and can be configured to do more.

I ended up installing it on both my Windows machine for work and my personal Ubuntu machine. However, I found the process more difficult on Ubuntu so I’m writing down the steps here.
Install Oh my Posh
The docs are fairly clear here so I recommend you follow along with them as they will be kept up to date. As of writing this post you need to run the following:
## Install Oh my Posh
sudo wget https://github.com/JanDeDobbeleer/oh-my-posh/releases/latest/download/posh-linux-amd64 -O /usr/local/bin/oh-my-posh
sudo chmod +x /usr/local/bin/oh-my-posh

## Download the themes
mkdir ~/.poshthemes
wget https://github.com/JanDeDobbeleer/oh-my-posh/releases/latest/download/themes.zip -O ~/.poshthemes/themes.zip
unzip ~/.poshthemes/themes.zip -d ~/.poshthemes
chmod u+rw ~/.poshthemes/*.json
rm ~/.poshthemes/themes.zip
Change your prompt
This is also pretty straightforward in the docs. Add the following to you ~/.bashrc and then source it. Replace {theme} below with your preferred theme. I like the Paradox theme.
eval "$(oh-my-posh --init --shell bash --config ~/.{theme}.omp.json)"
Setup the fonts
This is the tricky part. Start by installing a nerd font from here. I recommend using Meslo. Now you need to install the font to your system. Based on the instructions found here we should do the following:
cd ~
mkdir .fonts
unzip ~/Downloads/Meslo.zip -d ~/.fonts/Meslo
fc-cache -fv
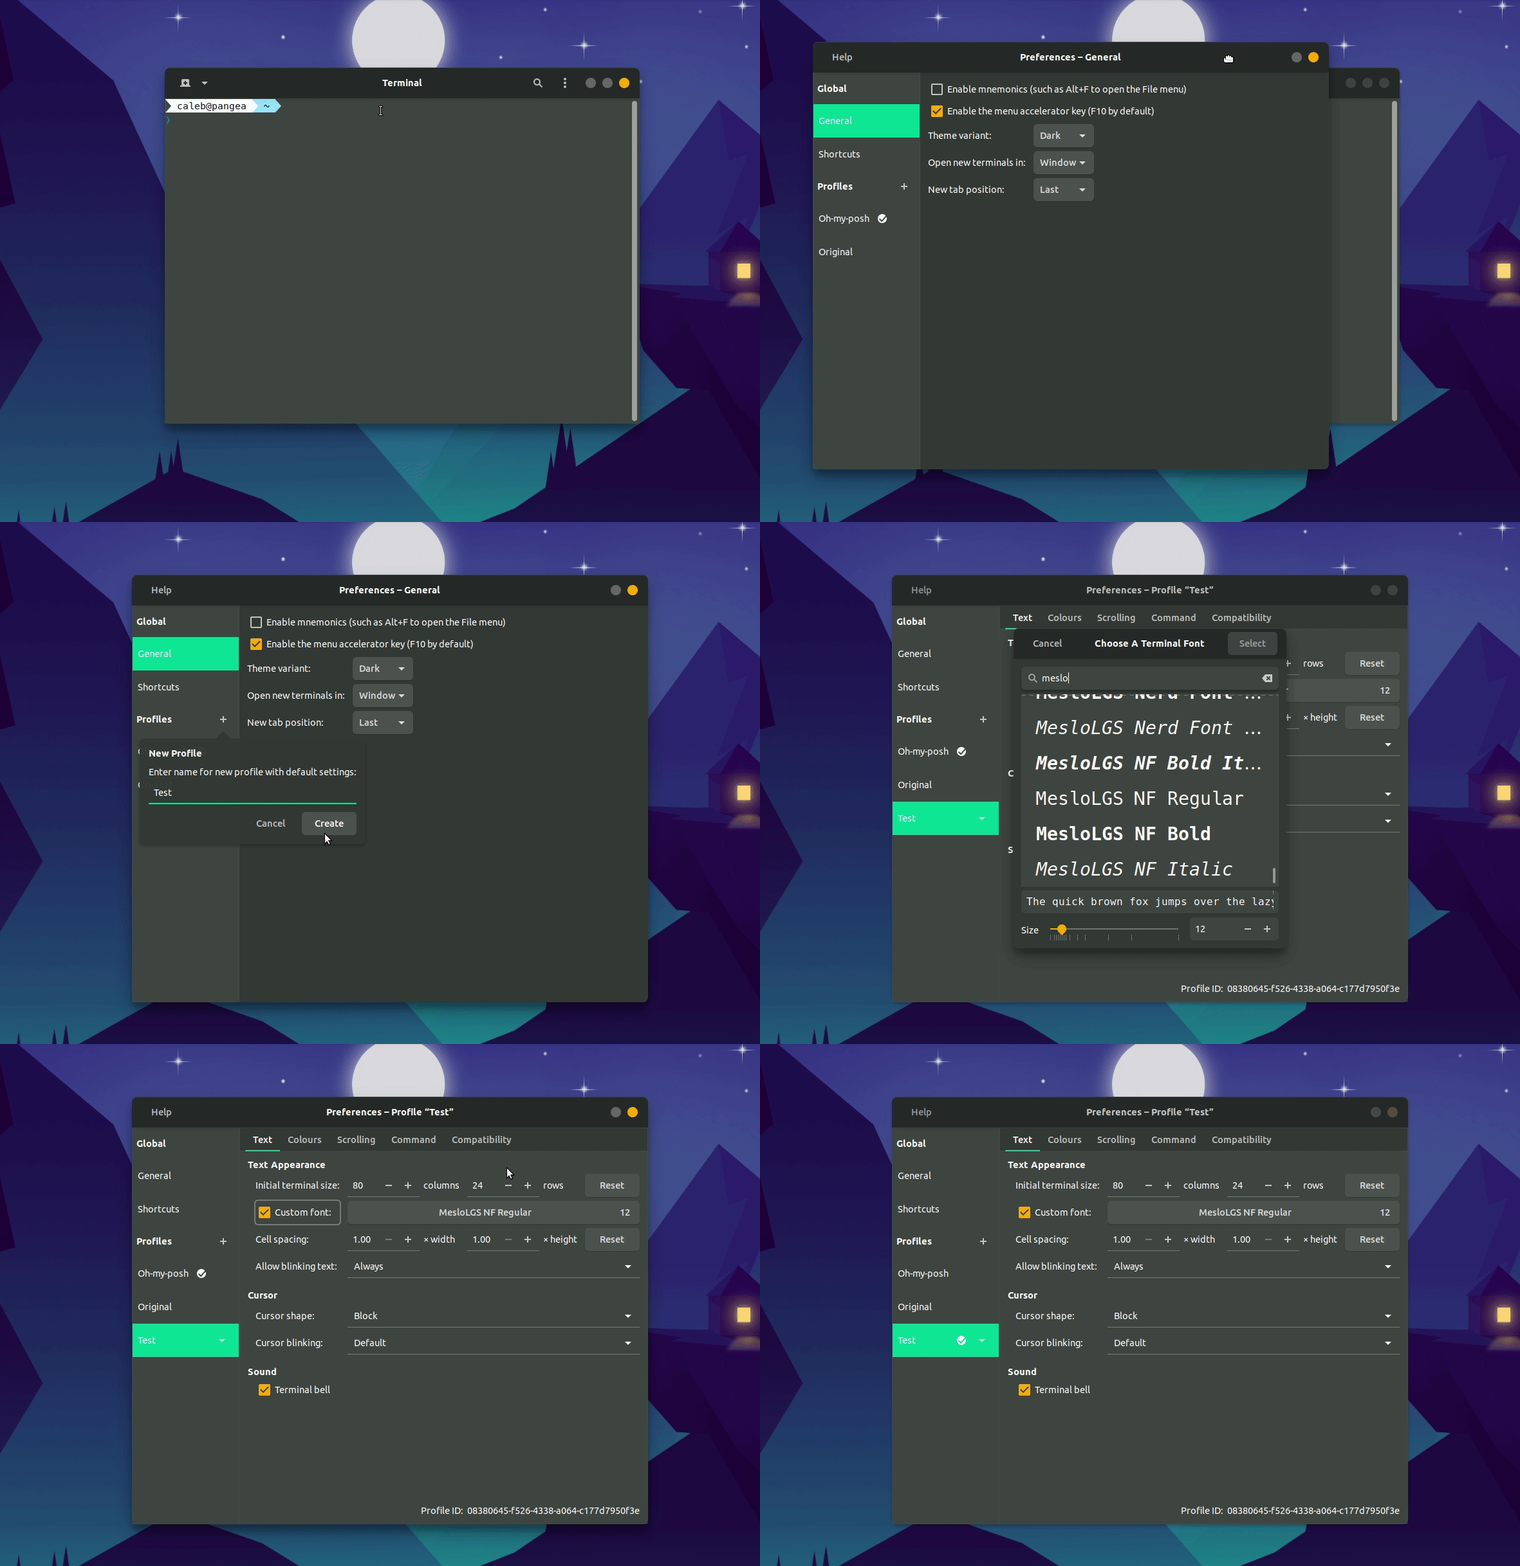
With the nerd font installed on the system we need to get Gnome Terminal to use it now. The gif below shows how to setup a new default profile using the font we installed.

After all that, you should be in business. Happy coding and I hope you find the theme as beautiful as I do.
Hey, if you've read this far you might like to join my email list.
I'll email you any time I publish something new.
No spam or ads. Unsubscribe as your heart desires.